...

...

Friday, August 26, 2016

Small-Portions Harvests

0
For a variety of reasons, our garden this year (as in many other years) yields "small-portion harvests" -- just enough during any given week to treat us to home-grown fruits and vegetables that subsidize the rest of our meals, but not enough to store away and preserve.  Every year I work towards a more productive harvest, and each year it does get a little bit better (except maybe this year -- drought, ya know).  Nevertheless, despite the frustrations, I am filled with gratitude and wonder at each small-portions harvest that comes from our land.

Isn't it beautiful?  Colours, textures, scents, and flavours....
Four kinds of tomatoes, 2 kinds of potatoes, husk/ground cherries, buttercup squash, and the inevitable egg (though the hens are starting to molt and egg production is decreasing).  Not shown are the Astrakom eggplant and the German Englischer custard squash (which have been suffering mold problems) that we already ate this week.

Many more tomatoes to ripen, more squash and eggplant, and at least 2-3 more buttercup squash on the volunteer vine that this one came off of.  Our best produce is grown from the compost pile.  If only my whole garden were as rich as our compost pile....

(I am considering for next year limiting the scope of my garden, so I can spend more time and have more earth to amending and enrich.  And if there's little planted, I can let the chickens in to help me out with that -- they would love that!)
Read More »

Monday, August 22, 2016

For the Joy of Garlic

0
I love growing garlic.  If the soil is rich enough, garlic can be a very rewarding (and easy) thing to grow.  Planted in late autumn, it sits in the garden throughout the winter, popping green shoots through the cold earth before anything else in the garden even begins thinking about waking up.  At our house, it begins showing before the daffodils and tulips.  During the spring it grows tall and strong, and when summer hits, it sends out twisting, curling scapes that will eventually carry a large, round, seedy blossom at the end (if not cut down).  By late July or early August, garlic is ready to be harvested and cured.  Right now, we have a bushel basket of garlic in our dining room, complete with scapes and stems and some flowers.  I held out some of the best bulbs for planting in October, but the rest will be used in soups, stir fries, sauces, and more.  Glorious, delicious, pungent garlic.


Read More »

Monday, August 15, 2016

Post-vacation Garden

0
After being gone for ten days, I returned to a garden overcome with weeds (crabgrass, going to seed!).  So today, despite the withering heat and humidity, I weeded.  And I weeded some more.  Then I took a little time to admire the actual plants in the garden -- the squash plant that ate Hadley, a multitude of green tomatoes in the tomato jungle, a couple of tiny little figs, and an eggplant.  I also did a little potato digging -- my first potato harvest!
We finally got a little rain,and August is good.  Now I wait for the ripening to begin.


Read More »

Easy-to-Peel Hardboiled Eggs

1
In the spring and summer, we get eggs.  Lots and lots of eggs.  I am always looking for new ways to fix eggs -- scrambled, fried, poached, in breads, in desserts, in stir-fries, in souffles, in bulls-eyes.  Egg salad is a popular option at our house, but hard-boiling and then peeling the eggs always seems like a lot of work -- especially since fresh eggs tend to be more difficult to peel.

My solution?  Steamed eggs.  They are tender, look and taste fresh, and are a dream to peel.

Here's the deal:
Bring a pot of water to steaming.  Add a single layer of eggs in a steamer.  Cover the pot and steam for ~13 minutes.  In the meantime, prepare a bowl of ice water.  When the eggs are done steaming, let them cool in the ice water and then start peeling.


Don't throw out those shells!  You can compost them, feed them back to the chickens to keep their calcium levels up, or put them around your tomatoes.
Read More »

Wednesday, July 20, 2016

Replacing Basement Windows

0

Our basement windows were a mess.  They were a mess when we bought our house -- rusted open, rusted closed, providing poor insulation and protection from the weather.  They were single pane, old glass, steel frame and casing in concrete, and original to the house.  But it gets better -- within the last couple of years, they have had holes broken into them, leaving the basement drafty, damp, and buggier than usual. They were just lovely.


So I decided it was time to replace them. I've never done windows before, but I have wanted to, and basement windows seemed the perfect place to start.  First I watched a few YouTube videos on replacing basement windows.  The videos, of course, make it seem so easy.   I made my list of tools and supplies (windows, concrete mix, professional caulking, and foam insulation), made measurements, and got started.

Part 1: Removing the old window from its frame.
This was much simpler than it seemed it would be.  There was a single metal hinge on the window that easily slid up and out of the frame.


Part 2: Removing the frame/casing.
After realizing that the frame was steel and embedded in the concrete and understanding that I would need to rent a reciprocating saw in order to tear it out, I decided to forego this step and place the new windows without removing the frame.

Part 3: Preparing the new windows for insertion.
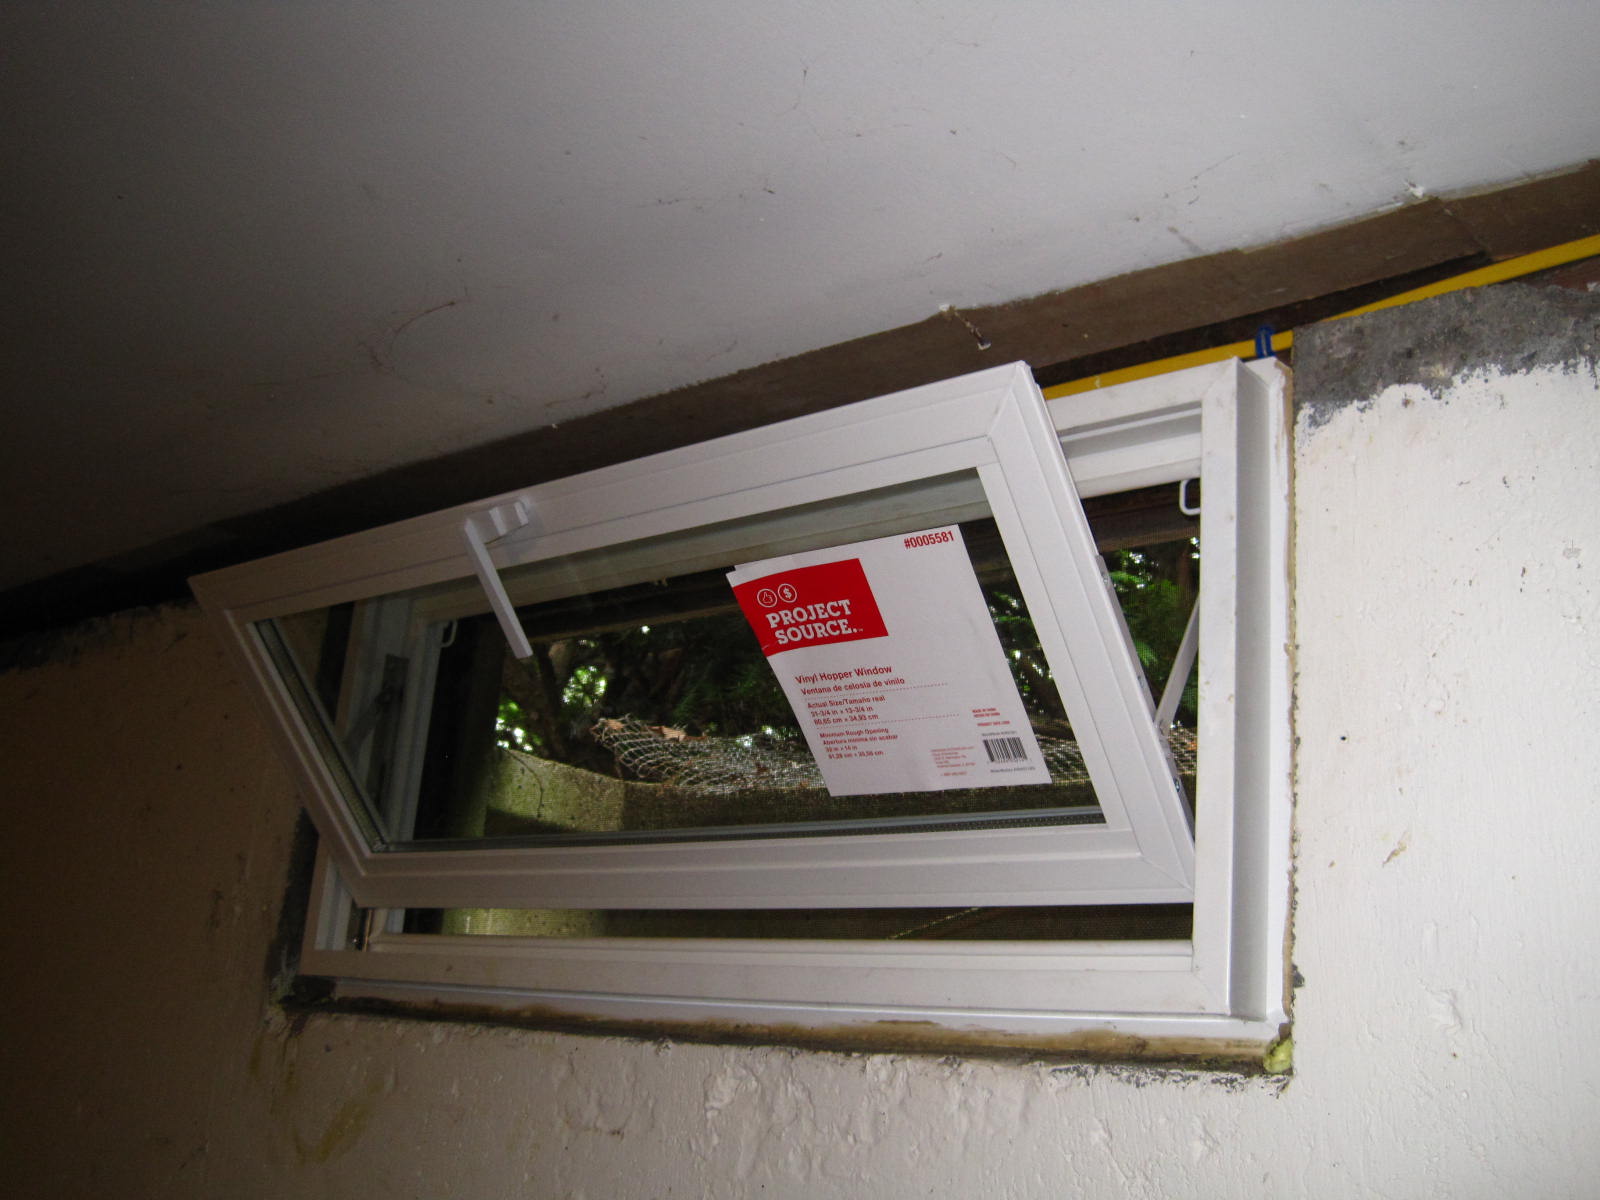
Crazily enough, the part I had the hardest time with was removing the glass from the new windows (Project Source Tilting Vinyl Windows from Lowe's) so I could easily work with the window frame without breaking the window.  I finally discovered the clip on the inside of the window hinge that needed to be snapped open to unlock it -- a small screwdriver was the perfect tool for the job.

Part 4: Inserting the new windows.
I fit the new windows flush against the old steel frame.  I had to fill some extra space with concrete (the new windows were slightly smaller than the space I was fitting them into).  Then I sealed the window with caulk and filled the gaps with insulation.  Since my basement is not a finished basement, a little mess around the windows isn't a big problem (though the windows I did after this one are a little neater).


Part 5: Replace the glass and screen into the window.
Reinserting the screen was tricky, since I had to fit it through the old steel frame and then into the new vinyl frame, but I discovered the trick, and the screens all went in.  Then I put in the glass, which, because the windows are so close to the drop ceiling, was more difficult that it should have been.


I removed the stickers, washed the glass and frames, and shazam -- I had 3 new basement windows!  I still have two windows left to replace, but I think I have the swing it now.  (Maybe someday I'll even put trim around them.)
Each window took about a day, but not a solid day -- there was lots of free time because of all the drying that needed doing.
We are very happy with the new windows so far.  The basement is quieter and less drafty, and the screens protect from random rocks breaking the glass and from bugs getting in when the windows are open (and they do actually open now).  Plus, I saved a bunch of money by doing the work myself!  Now it's time to get new covers for those window wells (which I will also have to make, since I have yet to find any in a store that actually fit).

Replacing basement windows soon?  Good luck!
Read More »