...

...
Showing posts with label efficiency. Show all posts

Thursday, September 22, 2016

The New Wheelbarrow; or, the Perils of a Too-Small Car

1
A few weeks ago, we had two cords of wood dumped onto our lawn -- potential energy to provide our winter heat.  Two cords is is big pile and it takes some effort to move.  We started in, piling it into our rickety wheelbarrow, and stacking it.  Until the off-balance wheelbarrow, which we bought second-hand at a garage sale, got a flat.  And not just a flat, but the flat after the flat after the flat that we already fixed.  So, we decided it was time to purchase a new wheelbarrow.

We went to box store #1.  Didn't find what we were looking for.  We went to box store #2.  Found what we were looking for.  Bought it, unreasonably excited to have a new wheelbarrow.

And we couldn't fit it in the car.

We both drive small, economy cars -- we try to be as efficient as possible.  But there was no way that wheelbarrow was going to fit in either of those cars.
A quandary.
Option: we decided to buy online.
Which we couldn't, without paying a huge shipping fee.

Option: get a wheelbarrow that's not assembled yet.
All the wheelbarrows, upon arriving at the store, are immediately put together.
And they can't be disassembled, because the people at the store use a fancy machine to make sure the bolts are too tight to remove.

Option: rent a truck and drive it home.
Really?  We have cars.  Why can't we get an unassembled wheelbarrow?!  We don't even need the box.
Plus, renting a truck for a wheelbarrow ....

Option: find a friend to pick it up for us.
Unfortunately, none of them with big enough vehicles were around at the time.

Option: go somewhere else and try again.
And so we did.  A locally own smaller-box store.  They had what we wanted, assembled, but were more than happy to take the time to disassemble their wheelbarrow, so we could fit it in our car and take it home.
And now, despite having too-small cars, we have a new wheelbarrow.  Soon we will also have marvelous stacks of wood, seasoning in our back yard, readying for the cold of winter.  With this heat potential, I can almost look forward to winter.
Read More »

Wednesday, July 20, 2016

Replacing Basement Windows

0

Our basement windows were a mess.  They were a mess when we bought our house -- rusted open, rusted closed, providing poor insulation and protection from the weather.  They were single pane, old glass, steel frame and casing in concrete, and original to the house.  But it gets better -- within the last couple of years, they have had holes broken into them, leaving the basement drafty, damp, and buggier than usual. They were just lovely.


So I decided it was time to replace them. I've never done windows before, but I have wanted to, and basement windows seemed the perfect place to start.  First I watched a few YouTube videos on replacing basement windows.  The videos, of course, make it seem so easy.   I made my list of tools and supplies (windows, concrete mix, professional caulking, and foam insulation), made measurements, and got started.

Part 1: Removing the old window from its frame.
This was much simpler than it seemed it would be.  There was a single metal hinge on the window that easily slid up and out of the frame.


Part 2: Removing the frame/casing.
After realizing that the frame was steel and embedded in the concrete and understanding that I would need to rent a reciprocating saw in order to tear it out, I decided to forego this step and place the new windows without removing the frame.

Part 3: Preparing the new windows for insertion.
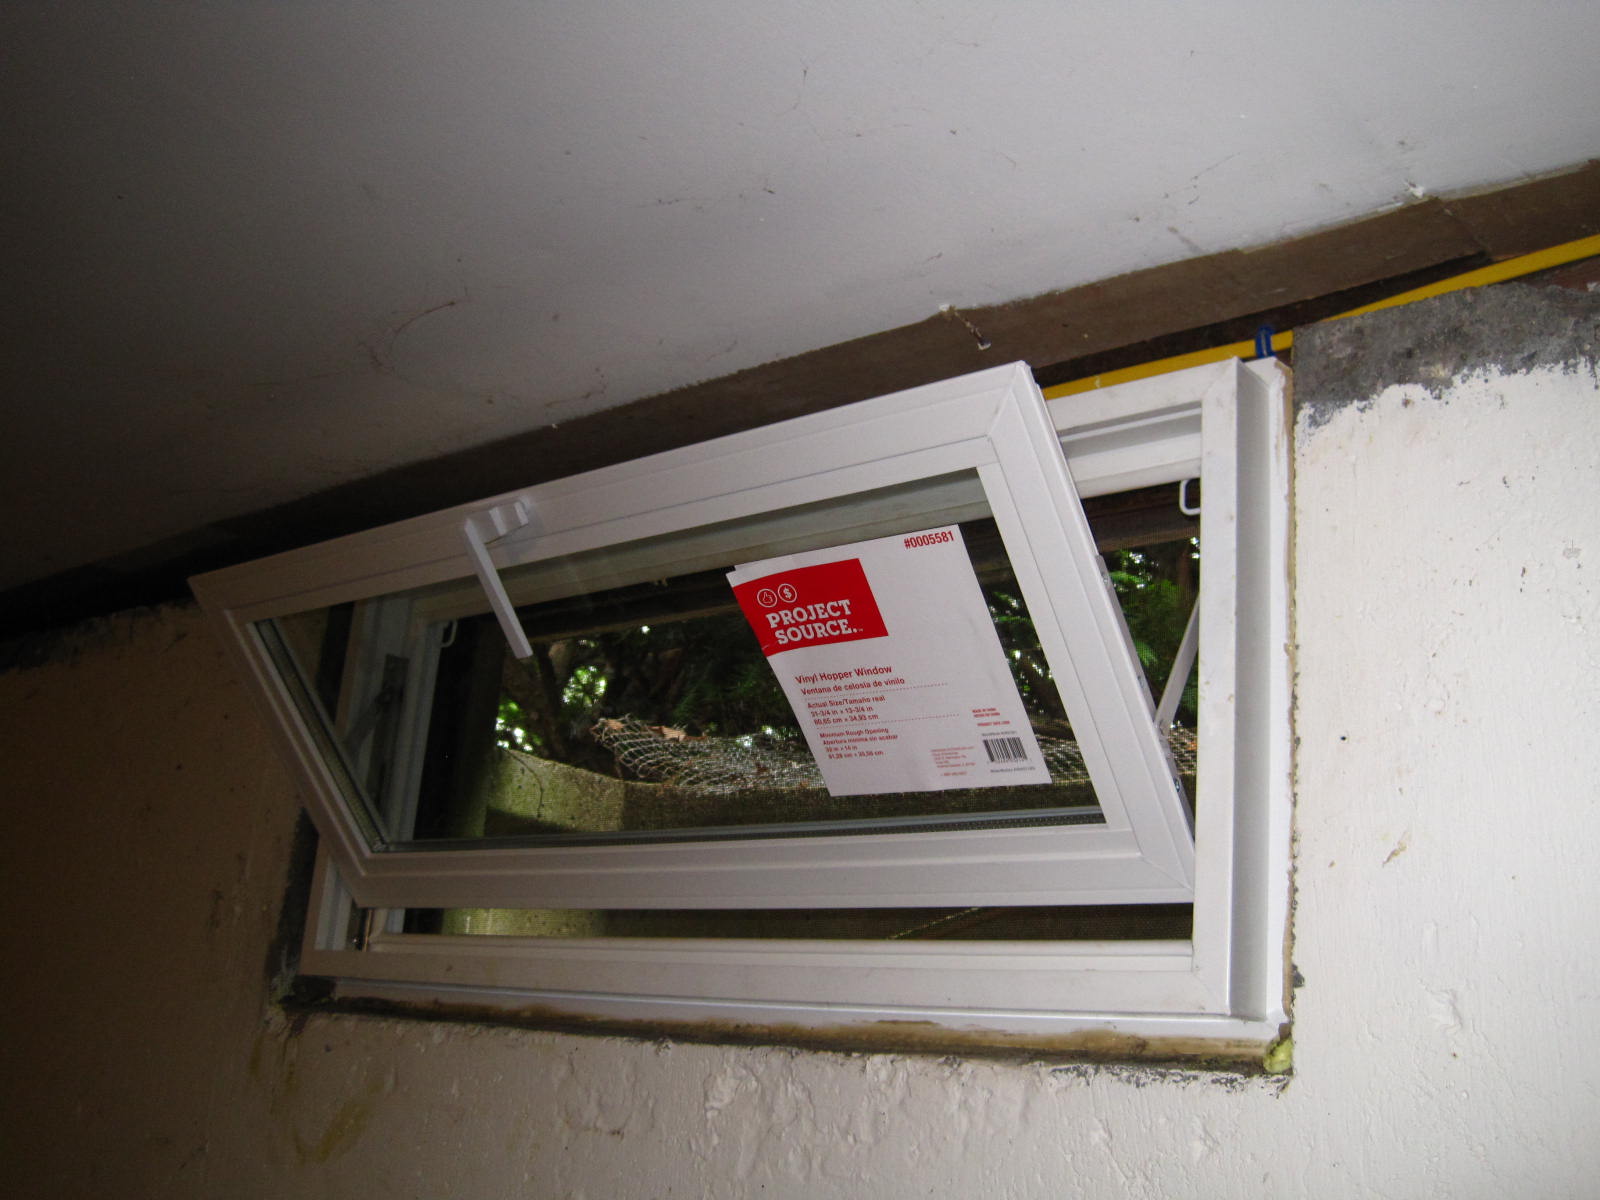
Crazily enough, the part I had the hardest time with was removing the glass from the new windows (Project Source Tilting Vinyl Windows from Lowe's) so I could easily work with the window frame without breaking the window.  I finally discovered the clip on the inside of the window hinge that needed to be snapped open to unlock it -- a small screwdriver was the perfect tool for the job.

Part 4: Inserting the new windows.
I fit the new windows flush against the old steel frame.  I had to fill some extra space with concrete (the new windows were slightly smaller than the space I was fitting them into).  Then I sealed the window with caulk and filled the gaps with insulation.  Since my basement is not a finished basement, a little mess around the windows isn't a big problem (though the windows I did after this one are a little neater).


Part 5: Replace the glass and screen into the window.
Reinserting the screen was tricky, since I had to fit it through the old steel frame and then into the new vinyl frame, but I discovered the trick, and the screens all went in.  Then I put in the glass, which, because the windows are so close to the drop ceiling, was more difficult that it should have been.


I removed the stickers, washed the glass and frames, and shazam -- I had 3 new basement windows!  I still have two windows left to replace, but I think I have the swing it now.  (Maybe someday I'll even put trim around them.)
Each window took about a day, but not a solid day -- there was lots of free time because of all the drying that needed doing.
We are very happy with the new windows so far.  The basement is quieter and less drafty, and the screens protect from random rocks breaking the glass and from bugs getting in when the windows are open (and they do actually open now).  Plus, I saved a bunch of money by doing the work myself!  Now it's time to get new covers for those window wells (which I will also have to make, since I have yet to find any in a store that actually fit).

Replacing basement windows soon?  Good luck!
Read More »

Wednesday, June 22, 2016

Fix it, Mend it, Make it Better

0

I was really hoping this post would be a great how-to for fixing a sprung couch.  But when I opened up the bottom of the couch last week to fix the springs, they were all in order.  I realized that the problems with our couch, though caused in part by the pulling of the springs, are more about the frame (which was constructed with staples!), and fixing that is going to take a lot more work than I had time, tools, or strength for that day.

But I love fixing things.  If you fix something, and fix it yourself, you don't have to pay someone else to do it for you, don't have to buy a new one, and don't have to throw out the old one.  More skills, less waste, more satisfaction, less money.

Three things I've actually fixed in the last few months:


Kitchen faucet, spraying water sideways.
CLRed the aerator.  Otherwise, because the faucet is so old (and small), I probably would have had to purchase and replace the whole faucet setup.


Toilet, running.
Replaced the rubber gasket.  This toilet is no longer wasting water!


Vacuum, not vacuuming.
This I do pretty regularly -- clean out EVERYTHING.  Take apart, rinse, clean, and dry.  This 9-year-old cheap vacuum is still pulling up the dog hair from the carpet.

Have something that's not working right? or something that's broken?  Try fixing it before you throw it out and get a new one.  Don't know where to start?  Search it up online -- there are lots of great fix-it sites out there and a lot of great fix-it videos, too.  Learn something new and have fun!
Read More »

Monday, April 4, 2016

Winter Improvements

1
It's a still, quiet morning.  The snow outside is dampening the sounds of the few cars on the road, and the birds have left off singing their spring songs.  It seems a good day to look back on the three major improvements we made on our house last summer and autumn to make it more winter efficient. 

Our house is heated entirely by electric radiant heat from the ceiling.  Electric radiant ceiling heat is delightful -- it feels like the summer summer sun when you can turn it up high and not worry about the cost of electricity, monetarily or environmentally.  We worry about both.  And so last summer and autumn, we began to look into improvements* that could be made on our older, not-quite-perfectly-sealed house.  Here are the three things we did:

1. Make window inserts.

I constructed a couple of window inserts using wood, wood glue, and plastic window sheeting.  I hope over the years to perfect the method and build a solid squadron of these that can be placed in the windows to help with the drafts.  A table saw was the only tool needed.


2. Install programmable thermostats.
Each room in our house has its own thermostat.  Five of the rooms we only heat on an as-used basis (like the guest room), but the others we like to heat at least enough to take off some of the winter chill.  Over the summer I installed programmable thermostats in five rooms, so the heat would be up only when needed, and we wouldn't have to remember to turn it down again.
Until I replaced the thermostats, we still had the original (beautiful) thermostats that came with the house when it was built in 1959.  I far prefer the look of them -- vintage and bronze -- but there are times when one must make sacrifices!  The ones I installed look a little better than I thought they would, and they are quite easy to use.


3. Put a wood stove insert into our fireplace.

We have a lovely fireplace.  It faces our living room, and backs into the kitchen.  We have used it in past winters, but it has not been an efficient source of heat, allowing a fair portion of it to escape up the chimney, and requiring quite a bit of work to keep going on a cold evening.  It never really heated much of the living room, and the back wall to the kitchen rarely warmed enough to make a difference.  So this fall we *finally* (after years of waiting and saving) had the Pacific Energy Super insert installed. 
I admit that this was not my first (or even second) choice of inserts, but the size and setup of our fireplace was small, and this was the best insert that would fit.  We had a few problems with its initial installation, but after getting a replacement firebox and fan, it works wonderfully well.  When left burning for a full day or longer, it heats the living room, the kitchen (via radiant heat from the brick wall), and a fair portion of the upstairs; and even if it doesn't burn through the whole night, there is often enough heat in the brick and the insert to keep the downstairs warm enough that the electric heat doesn't have to turn on.  It keeps us cozy!


Making these improvements have vastly decreased our electricity usage (of course, a mild winter doesn't hurt), and they should pay themselves off within just a few years.  Plus, they make us a little bit less dependent on the big energy suppliers and the accompanying market fluctuations.

*We did look into solar this past summer, but the upfront costs were prohibitive, and we don't have enough property for a windmill.
Read More »