I love growing garlic. If the soil is rich enough, garlic can be a very rewarding (and easy) thing to grow. Planted in late autumn, it sits in the garden throughout the winter, popping green shoots through the cold earth before anything else in the garden even begins thinking about waking up. At our house, it begins showing before the daffodils and tulips. During the spring it grows tall and strong, and when summer hits, it sends out twisting, curling scapes that will eventually carry a large, round, seedy blossom at the end (if not cut down). By late July or early August, garlic is ready to be harvested and cured. Right now, we have a bushel basket of garlic in our dining room, complete with scapes and stems and some flowers. I held out some of the best bulbs for planting in October, but the rest will be used in soups, stir fries, sauces, and more. Glorious, delicious, pungent garlic.
...
Showing posts with label edibles. Show all posts
Monday, August 22, 2016
Monday, August 15, 2016
Easy-to-Peel Hardboiled Eggs
1
In the spring and summer, we get eggs. Lots and lots of eggs. I am always looking for new ways to fix eggs -- scrambled, fried, poached, in breads, in desserts, in stir-fries, in souffles, in bulls-eyes. Egg salad is a popular option at our house, but hard-boiling and then peeling the eggs always seems like a lot of work -- especially since fresh eggs tend to be more difficult to peel.
My solution? Steamed eggs. They are tender, look and taste fresh, and are a dream to peel.
Here's the deal:
Bring a pot of water to steaming. Add a single layer of eggs in a steamer. Cover the pot and steam for ~13 minutes. In the meantime, prepare a bowl of ice water. When the eggs are done steaming, let them cool in the ice water and then start peeling.
Don't throw out those shells! You can compost them, feed them back to the chickens to keep their calcium levels up, or put them around your tomatoes.
Read More »
My solution? Steamed eggs. They are tender, look and taste fresh, and are a dream to peel.
Here's the deal:
Bring a pot of water to steaming. Add a single layer of eggs in a steamer. Cover the pot and steam for ~13 minutes. In the meantime, prepare a bowl of ice water. When the eggs are done steaming, let them cool in the ice water and then start peeling.
Don't throw out those shells! You can compost them, feed them back to the chickens to keep their calcium levels up, or put them around your tomatoes.
Saturday, July 9, 2016
The Bramble Ramble
0
Read More »
Our house is bordered on one side by an overgrowth of bushes and trees and brush, some of it planted there when the house was built all those decades ago and allowed to metastasize, and some of it random growth. Among that random growth (some would call it weeds) is a stretch of wild black raspberries which this year decided to produce a beautiful quantity of fruit.
Unfortunately, the recent near-drought has turned most of those juicy berries into sweet, crunchy seedpods. However, because of all those beautiful berries and lush greenery, I was inspired to create a "bramble ramble" -- to clear out some of the over- and under-growth and increase the swath of bramble berry bushes.
So I cleared growth from around the wild patch. I traded with a neighbour some fresh eggs for raspberry canes. I cleared more brush, dug out even more burning bushes, trimmed back trees, and created space. Then I planted the bartered-for canes (along with a little compost from the chicken run). I watered. I waited. I watered some more.
The canes that were alive when I planted them are thriving -- one is even producing more canes already! I look forward to tearing out some more burning bush (they are seriously taking over our property) and adding more raspberries to the "ramble." I'm even considering transplanting the gooseberries to this space next year, but I haven't yet decided about that.
Now I wait with patience for those delicious berries next year, and hope I get to them before the birds!
Tuesday, June 28, 2016
Preserve a Little Summer : Peach Butter
0
Two words: Peach Butter
Peaches + Sugar + Lemon = Summer in a jar = sweet warm sunshine for the middle of winter
Our peach tree did absolutely nothing this year, and by nothing I mean it didn't even blossom. Heartbreaking -- I was very much looking forward to my first great crop of peaches. However, peaches in other parts of the country must be doing well, because our local market had boxes and boxes of peaches at very lovely price. So I got some.
And I set off to make peach butter. A quick blanch of the peaches in boiling water helps the peels come off, and I peeled, pitted, and chopped about 4+ pounds (I don't have a kitchen scale, so weight measurements are tricky), and set them in a pot to cook down to softness. I also added the zest and juice of a lemon to both balance the flavour and add acid for canning.
When the peaches were soft, I spooned them into the blender to break down even further, to a smooth, spreadable consistency. Four blenderfuls later, I had about 7.5 cups of peach puree, to which I added sugar (about 3.5 cups), and put it back on the stove to cook down and thicken up.
Delicious.
The jars had been preparing, so I spooned peach/lemon/sugar mixture into hot jars and put them in the hot water canner to process for about 15 minutes.
When they were done, I had five beautiful half pints and 4 quarter pints ("jelly-sized) of peach butter -- perfect for reminding me in January and February that summer is not a figment of my imagination -- and great for gifts, too!
You can find great peach butter recipes in these two books -- one for regular peach butter (like you see here) and one for roasted peach butter, which is also delicious, but takes more peaches (I made some of that, too).
Recipe
Ingredients
Peaches: peeled, pitted, chopped
Lemon: juice & zest (one lemon for 7-8 cups of puree)
Sugar: about 1/2 cup for each cup of pureed peach
Directions
Cook the chopped peaches (add a little water to the bottom of the pot) until they are soft and smashable. Spoon peaches into blender or food processor in small batches. Puree/blend until smooth and spreadable but not liquid. Pour peaches into clean pot and add in lemon and sugar; stir in until sugar is dissolved. Heat mixture at medium heat until it reaches a jam-like density*.
Meanwhile, prepare your jars. Clean and heat lids, rings, and jars -- sizes and amount vary by amount of peach butter.
When the peach butter has reached the right consistency, pour into jars. Wipe off the mouths of the jars and top with lids and rings. Process in hot water canner for 15 minutes for half-pint jars.
If you have a little extra that doesn't fit in a jar, there's no harm in just sticking it in the fridge to eat in the summer!
*To test for jam and fruit butter readiness, drop a small, small spoonful onto a chilled plate. If it spreads and/or separates, it's not ready yet. If it holds its shape like a blob of jam, it's good to go.
Read More »
Peaches + Sugar + Lemon = Summer in a jar = sweet warm sunshine for the middle of winter
Our peach tree did absolutely nothing this year, and by nothing I mean it didn't even blossom. Heartbreaking -- I was very much looking forward to my first great crop of peaches. However, peaches in other parts of the country must be doing well, because our local market had boxes and boxes of peaches at very lovely price. So I got some.
And I set off to make peach butter. A quick blanch of the peaches in boiling water helps the peels come off, and I peeled, pitted, and chopped about 4+ pounds (I don't have a kitchen scale, so weight measurements are tricky), and set them in a pot to cook down to softness. I also added the zest and juice of a lemon to both balance the flavour and add acid for canning.
When the peaches were soft, I spooned them into the blender to break down even further, to a smooth, spreadable consistency. Four blenderfuls later, I had about 7.5 cups of peach puree, to which I added sugar (about 3.5 cups), and put it back on the stove to cook down and thicken up.
Delicious.
The jars had been preparing, so I spooned peach/lemon/sugar mixture into hot jars and put them in the hot water canner to process for about 15 minutes.
When they were done, I had five beautiful half pints and 4 quarter pints ("jelly-sized) of peach butter -- perfect for reminding me in January and February that summer is not a figment of my imagination -- and great for gifts, too!
You can find great peach butter recipes in these two books -- one for regular peach butter (like you see here) and one for roasted peach butter, which is also delicious, but takes more peaches (I made some of that, too).
Recipe
Ingredients
Peaches: peeled, pitted, chopped
Lemon: juice & zest (one lemon for 7-8 cups of puree)
Sugar: about 1/2 cup for each cup of pureed peach
Directions
Cook the chopped peaches (add a little water to the bottom of the pot) until they are soft and smashable. Spoon peaches into blender or food processor in small batches. Puree/blend until smooth and spreadable but not liquid. Pour peaches into clean pot and add in lemon and sugar; stir in until sugar is dissolved. Heat mixture at medium heat until it reaches a jam-like density*.
Meanwhile, prepare your jars. Clean and heat lids, rings, and jars -- sizes and amount vary by amount of peach butter.
When the peach butter has reached the right consistency, pour into jars. Wipe off the mouths of the jars and top with lids and rings. Process in hot water canner for 15 minutes for half-pint jars.
If you have a little extra that doesn't fit in a jar, there's no harm in just sticking it in the fridge to eat in the summer!
*To test for jam and fruit butter readiness, drop a small, small spoonful onto a chilled plate. If it spreads and/or separates, it's not ready yet. If it holds its shape like a blob of jam, it's good to go.
Sunday, June 19, 2016
Today in 5 Pictures: June 19
0
Read More »
| Clementine is feeling broody. |
![]() |
| Working on removing more burning bushes -- hopefully making way for more berry plants and fewer allergies. |
| Mabel loves scratching through the planters. |
| Peas! (They were advertised as bush, but are behaving more like vine.) |
| Colourful lettuce assortment. |
Labels:
chickens,
edibles,
food,
garden,
productivity,
vegetables,
work
Sunday, May 8, 2016
April Vacation Week: Blueberry Prep
2
Ground & soil preparation. That's what it's all about. When you're receiving new blueberry bushes in a couple of weeks and don't have anywhere to put them, it's time to think and prepare.
We are picking up 6 blueberry plants from the local grower Nourse Farms* in a couple of weeks. And though our yard is fairly good-sized, finding the right spot for the blueberries was not a simple task. We finally settled on a long, sunny space at the back of the house which, unfortunately, has been home to flowering quince and a burning bush of advanced age and size. With depleted soil and big bushes in the way, preparation had to begin.
I have some experience pulling out shrubs by hand. When we moved into our home six years ago, I spent the entire first spring and summer pulling out overgrown yews that had blanketed the shady front of the house (that space is now filled with ferns and astilbe and monkshood and toad lily and such). I sawed, chopped, cut, dug, and pulled until I had removed at least five huge yews. This time I had fewer shrubs to remove, but they were just as old -- and two of them were thorny.
First I removed the flowering quince. Two plants that were in reality three or four. They had been left to their own growing for a number of years (other than some minor prunings) and had tall, straight, thorny branches, as well as some decoratively twisty ones. It took me three days to remove them and most of their roots. (You should have seen the worms I found! As big around as my thumb and twice as long!) I dug some chicken compost from the chicken run and started layering it into the old, undernourished soil, along with not-yet-totally-composted compost and some purchased organic compost. Layers of dirt and compost to fill in the holes left by the quince.
Next it was time to work on the 10 foot+ burning bush that sat at the corner of our house. The branches are all gone and the digging has begun. The first "real" root I ran into (about 30 seconds into digging) was a twist of two roots, which combined were thicker than my arm and much longer. I don't know if you have experience with burning bush, but its roots go on and on -- I dig new roots from it out of the garden every year (that's where all the nutrition I pile into my garden every year goes), and they are never smaller around than my fingers -- and many of them are webby and difficult to dig through.
The dreadful weather has put a serious pause in my work -- I started over April vacation week, but have had nothing but rain and chill since with no opportunity to work more. I think the burning bush will take multiple days of hard work, digging, hacking, chopping. The chickens, at least, are looking forward to it.
*I love Nourse Farms -- they have blueberry picking in the summer and sell tons of fabulous fruit plants -- we purchased their strawberry collection a couple of years ago and this year purchased their blueberry collection. We have also purchased gooseberry and elderberry plants from them -- which are legal in our Massachusetts town.
Read More »
We are picking up 6 blueberry plants from the local grower Nourse Farms* in a couple of weeks. And though our yard is fairly good-sized, finding the right spot for the blueberries was not a simple task. We finally settled on a long, sunny space at the back of the house which, unfortunately, has been home to flowering quince and a burning bush of advanced age and size. With depleted soil and big bushes in the way, preparation had to begin.
I have some experience pulling out shrubs by hand. When we moved into our home six years ago, I spent the entire first spring and summer pulling out overgrown yews that had blanketed the shady front of the house (that space is now filled with ferns and astilbe and monkshood and toad lily and such). I sawed, chopped, cut, dug, and pulled until I had removed at least five huge yews. This time I had fewer shrubs to remove, but they were just as old -- and two of them were thorny.
![]() |
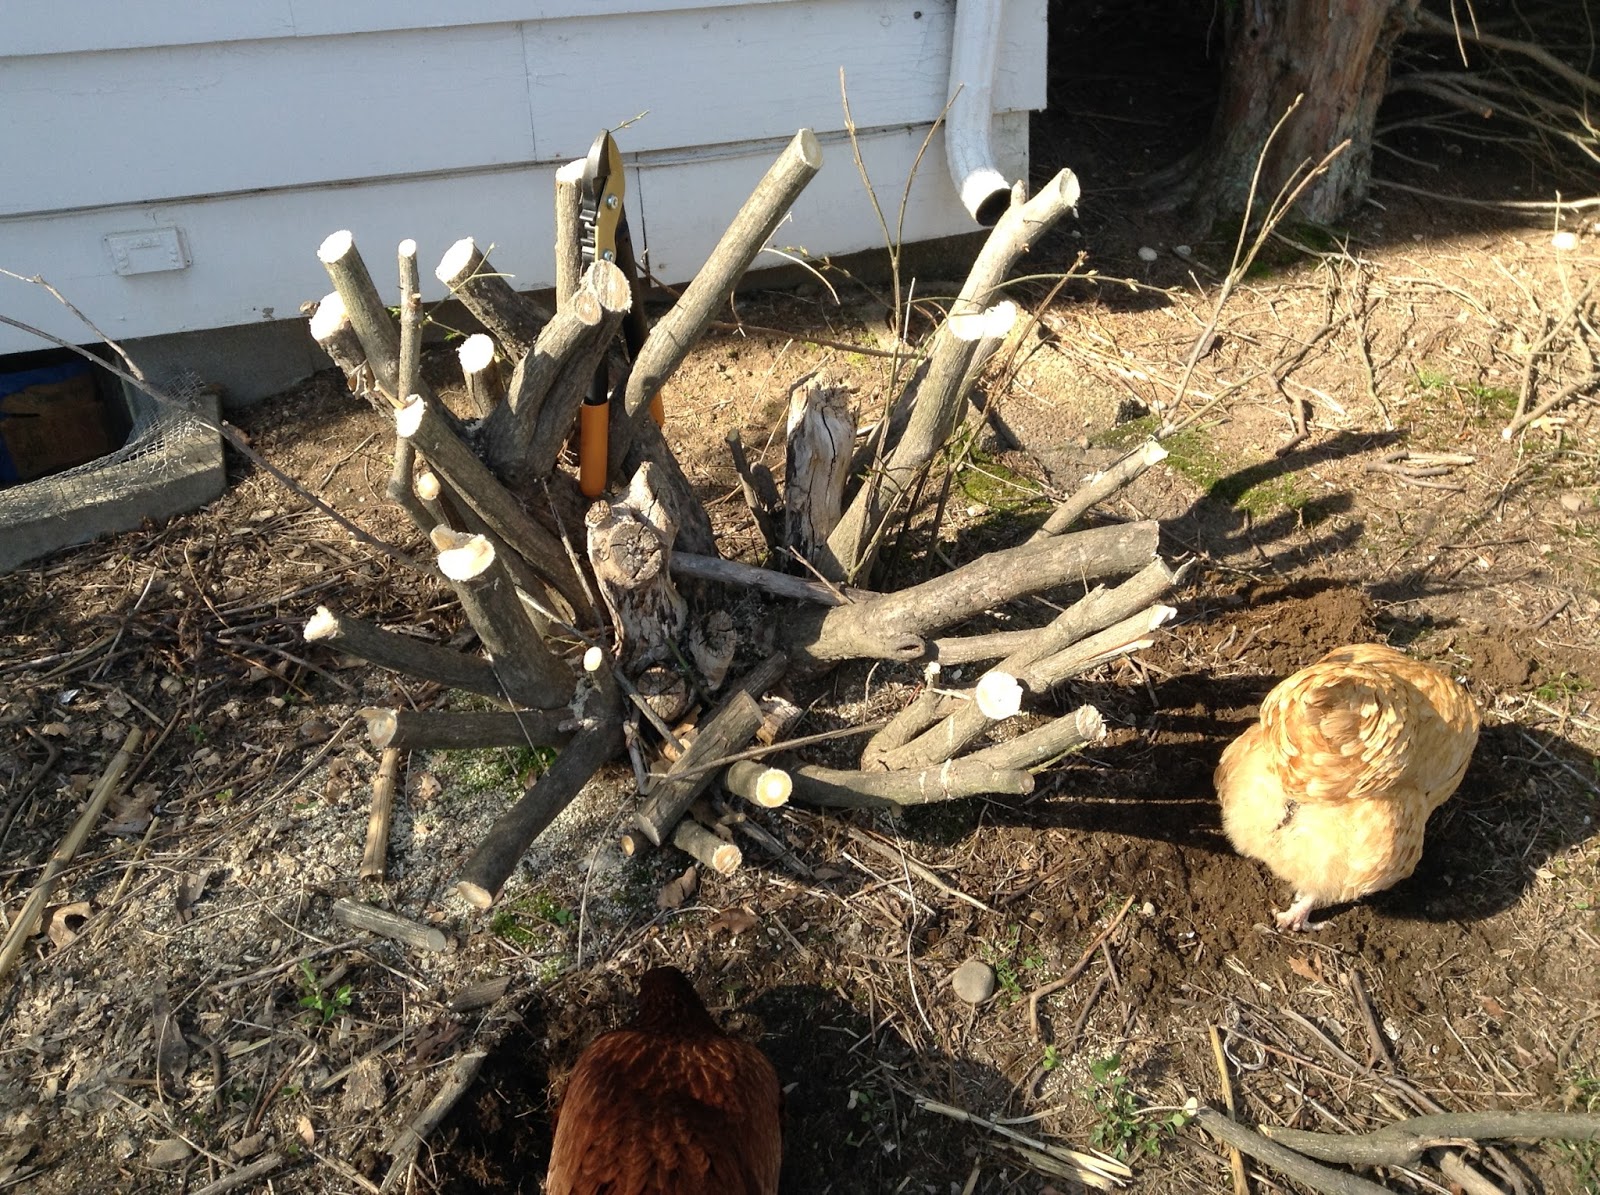
| Ornamental quince stumps. |
![]() |
| Quince & burning bush branches. |
![]() |
| The burning bush before. |
![]() |
| Burning bush after. |
Next it was time to work on the 10 foot+ burning bush that sat at the corner of our house. The branches are all gone and the digging has begun. The first "real" root I ran into (about 30 seconds into digging) was a twist of two roots, which combined were thicker than my arm and much longer. I don't know if you have experience with burning bush, but its roots go on and on -- I dig new roots from it out of the garden every year (that's where all the nutrition I pile into my garden every year goes), and they are never smaller around than my fingers -- and many of them are webby and difficult to dig through.
The dreadful weather has put a serious pause in my work -- I started over April vacation week, but have had nothing but rain and chill since with no opportunity to work more. I think the burning bush will take multiple days of hard work, digging, hacking, chopping. The chickens, at least, are looking forward to it.
*I love Nourse Farms -- they have blueberry picking in the summer and sell tons of fabulous fruit plants -- we purchased their strawberry collection a couple of years ago and this year purchased their blueberry collection. We have also purchased gooseberry and elderberry plants from them -- which are legal in our Massachusetts town.
Wednesday, April 27, 2016
April Vacation Week: Garden
0
This year, during April vacation week, I finally pounded fence posts in around the garden and put up an almost respectable looking fence -- a necessity since getting chickens and newish neighbours (it never hurts to make your garden and property look a little nicer, even if it is being productive and efficient). The fence has done a wonderful job of keeping the chickens out and has allowed me to to *finally* get my spring planting started.
The garlic has been coming up nicely; it gets planted in October after the Garlic Fest, and we always have great luck with it. It's very exciting to see those green shoots coming up in the spring before anything else is growing. Though this year, I will admit, the lettuce also made a big showing -- I let it go to seed last summer and some of those seeds starting growing and leafing out pretty early this year.
Also recently planted is the spinach, which is starting to come up. This week saw the additions of more lettuce, kale, beets, peas, and potatoes (purple and golden). Hopefully, I have amended the garden soil sufficiently and the plants will have enough nutrients to grow. I am so excited to get those seeds into the ground and to see them start sprouting. I have never planted potatoes before, and can't wait to see how they turn out. They have been planted in the newest part of the garden, though -- the part that has been improved the least -- so we'll see how it goes. Carrots will go in soon.
I started the tomatoes and eggplant inside. This is something I usually do much earlier in the year, but I had an ailing cat that occupied my time and energy, so I didn't get to them.
A new addition to my garden is an in-garden compost. I dug a shallow hole, took extra chicken-wire and formed a wide tube around the hole, and dumped compostables into it. I plan to move this one to a new location in the garden each year to further improve the quality of the soil.
(Some of our compost goes to the chickens, some to our black bin composter, and some into the garden. More on that in a later post.)
Tune in next time for the final post on what happened during April vacation week!
Read More »
This year, during April vacation week, I finally pounded fence posts in around the garden and put up an almost respectable looking fence -- a necessity since getting chickens and newish neighbours (it never hurts to make your garden and property look a little nicer, even if it is being productive and efficient). The fence has done a wonderful job of keeping the chickens out and has allowed me to to *finally* get my spring planting started. The garlic has been coming up nicely; it gets planted in October after the Garlic Fest, and we always have great luck with it. It's very exciting to see those green shoots coming up in the spring before anything else is growing. Though this year, I will admit, the lettuce also made a big showing -- I let it go to seed last summer and some of those seeds starting growing and leafing out pretty early this year.
Also recently planted is the spinach, which is starting to come up. This week saw the additions of more lettuce, kale, beets, peas, and potatoes (purple and golden). Hopefully, I have amended the garden soil sufficiently and the plants will have enough nutrients to grow. I am so excited to get those seeds into the ground and to see them start sprouting. I have never planted potatoes before, and can't wait to see how they turn out. They have been planted in the newest part of the garden, though -- the part that has been improved the least -- so we'll see how it goes. Carrots will go in soon.
I started the tomatoes and eggplant inside. This is something I usually do much earlier in the year, but I had an ailing cat that occupied my time and energy, so I didn't get to them.
A new addition to my garden is an in-garden compost. I dug a shallow hole, took extra chicken-wire and formed a wide tube around the hole, and dumped compostables into it. I plan to move this one to a new location in the garden each year to further improve the quality of the soil.
(Some of our compost goes to the chickens, some to our black bin composter, and some into the garden. More on that in a later post.)
Tune in next time for the final post on what happened during April vacation week!
Sunday, April 24, 2016
April Vacation Week: Dandelions
0
What a week for April vacation -- warm, sunny, and perfect for high productivity. I took advantage.
With all the dandelions making their appearances, I decided to take Saturday afternoon to pull -- and pull and pull. Our front yard looks like a dandelion garden, which isn't so bad when they are yellow, but I'm not fond of them when they go to seed, which they do all too quickly. And since dandelions are such great sources for tea and tincture herbs, I didn't feel like I was wasting my time plucking so many of them from the ground (roots, blossoms, and leaves can all be used).
I pulled nearly a basket-full, using one of those special dandelion-picking tools that help get the roots out. Our lawn is in dire need of help (which it will continue to be until I can get it turned into a garden of sorts), and I was very pleased to realize that I was aerating it with every dandelion I pulled out. Then, to make the task even more beneficial, I filled each hole lightly with compost, to add a little extra nutrition to our under-cared-for lawn.
So I now have a load of dandelions to trim and wash and dry. I look forward to trying different herbal remedies with them. Unfortunately, I didn't take the time to behead them, so I could use the blossoms to make dandelion jelly, but I can still dehydrate the leaves and roast the roots for beneficial drinks and medicinals.
And in case you were worried, there are still plenty of them in the lawn, should I need more -- plenty so that the bees have something to eat while they wait for all the other flowers and blossoms to bloom.
Tune in next time for more April vacation week updates!
Read More »
With all the dandelions making their appearances, I decided to take Saturday afternoon to pull -- and pull and pull. Our front yard looks like a dandelion garden, which isn't so bad when they are yellow, but I'm not fond of them when they go to seed, which they do all too quickly. And since dandelions are such great sources for tea and tincture herbs, I didn't feel like I was wasting my time plucking so many of them from the ground (roots, blossoms, and leaves can all be used).I pulled nearly a basket-full, using one of those special dandelion-picking tools that help get the roots out. Our lawn is in dire need of help (which it will continue to be until I can get it turned into a garden of sorts), and I was very pleased to realize that I was aerating it with every dandelion I pulled out. Then, to make the task even more beneficial, I filled each hole lightly with compost, to add a little extra nutrition to our under-cared-for lawn.
So I now have a load of dandelions to trim and wash and dry. I look forward to trying different herbal remedies with them. Unfortunately, I didn't take the time to behead them, so I could use the blossoms to make dandelion jelly, but I can still dehydrate the leaves and roast the roots for beneficial drinks and medicinals.
And in case you were worried, there are still plenty of them in the lawn, should I need more -- plenty so that the bees have something to eat while they wait for all the other flowers and blossoms to bloom.
Tune in next time for more April vacation week updates!
Subscribe to:
Posts (Atom)